This tutorial is to change your shop's category tiles. Here's what you need to know:
- This is a general tutorial, your shop might be created in a different way
- You need to have a category created first. Please follow this tutorial to create a category: Categories. Make sure your category has a thumbnail image as most shop tiles use these.
To change your shop's category tiles, you first need to go to the shop's homepage and click "Edit page".
You'll see something similar to this. The #s are the category IDs:
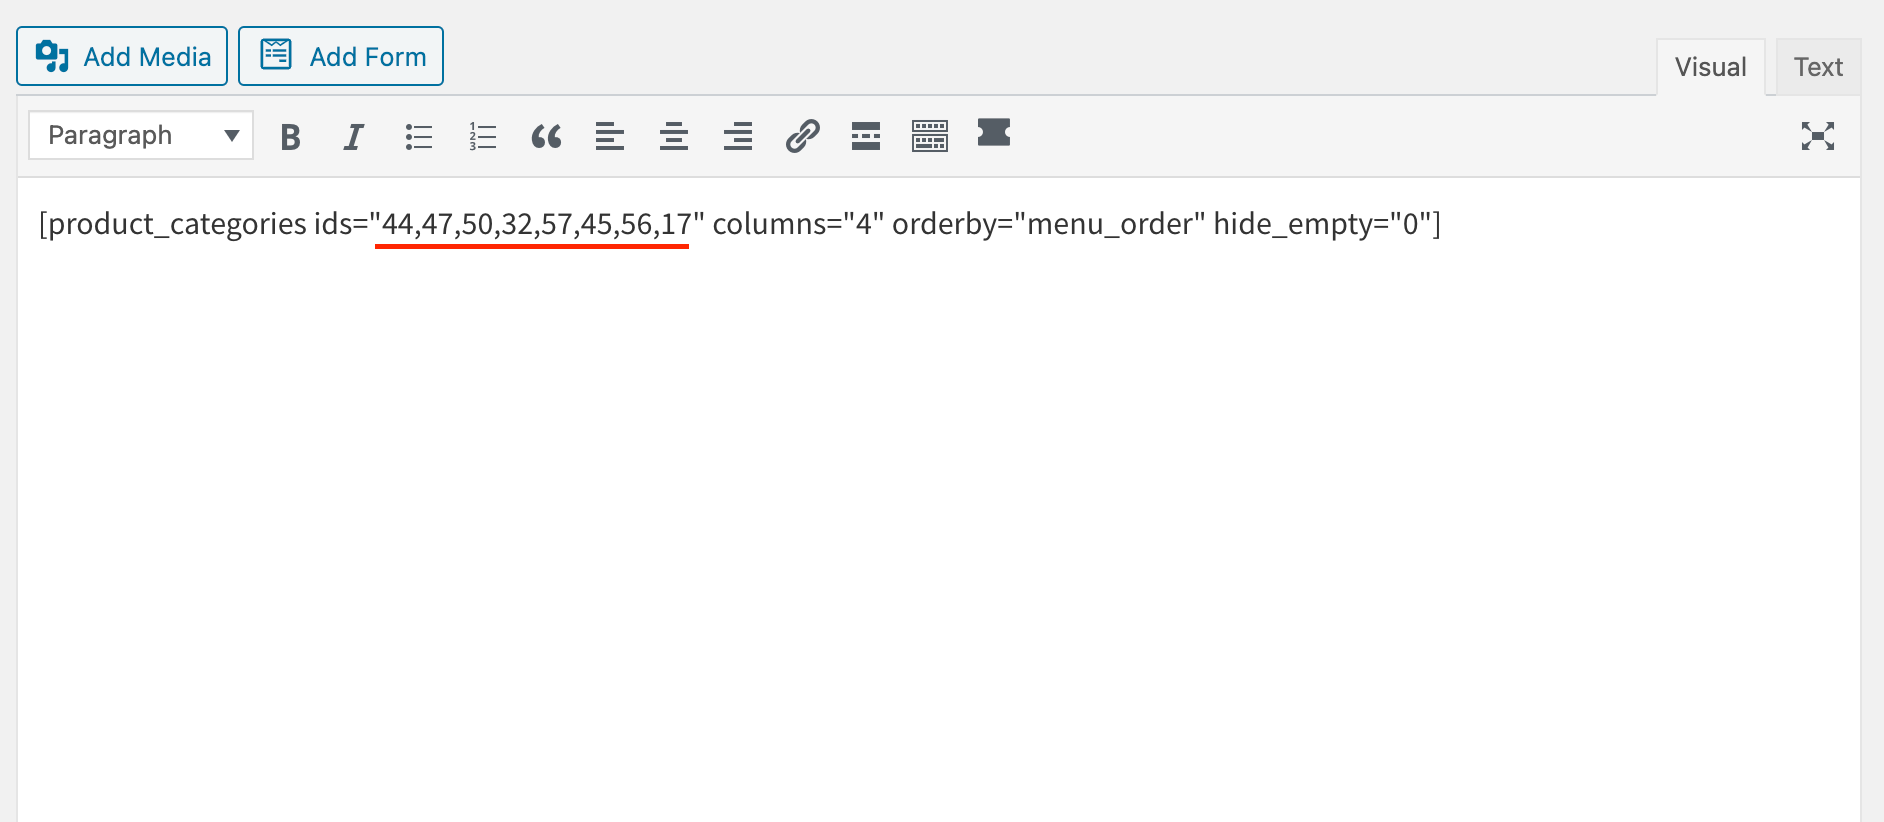
In the above example, there are 4 columns of category tiles/buttons. The IDs correspond to specific categories. You can add or remove these IDs after figuring out the corresponding category.
Find the Category ID:
Go to Products > Categories and click into a category. In the URL, look for a part like this: &tag_ID=# (The # represents the category ID number)
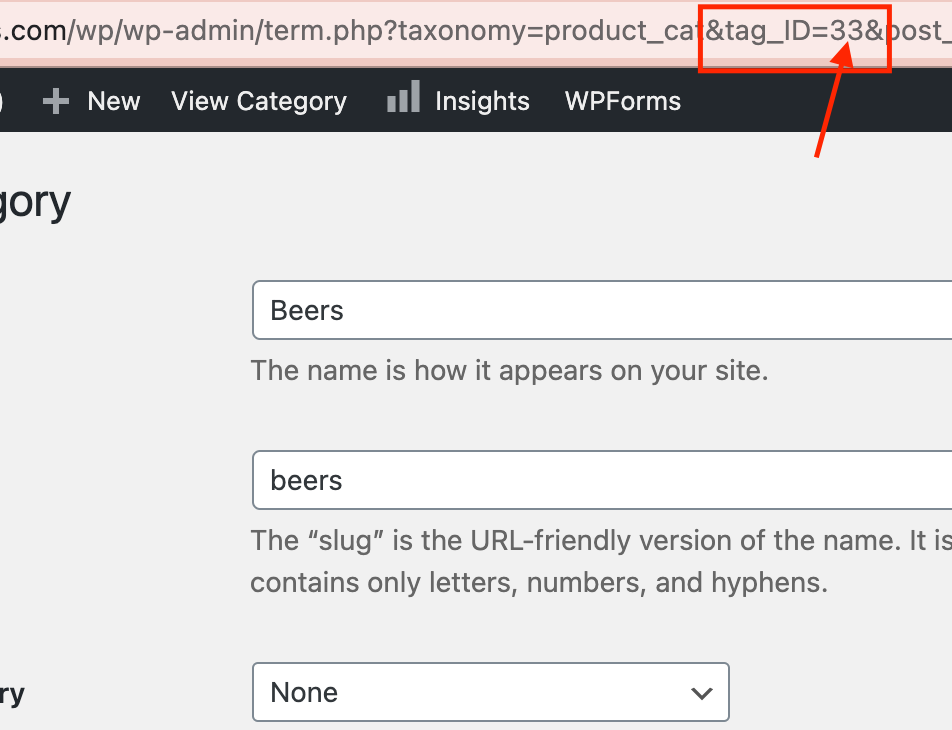
The number after tag_ID=___ is the category ID. Take that number and add it to to the end of the list of category IDs on the homepage.
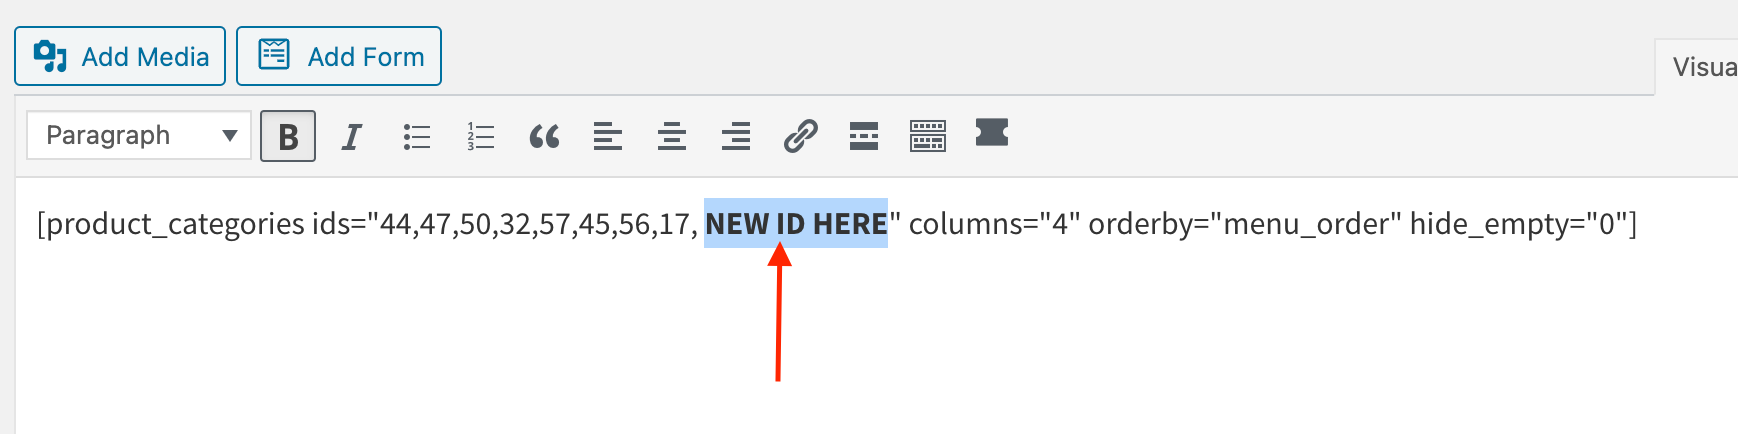
After you add the new category ID, press the blue "Update" button on the page. You now have a new category tile on your shop's homepage!
You can also do this to find the category IDs and remove #s from the homepage.
Change the order of shop tiles
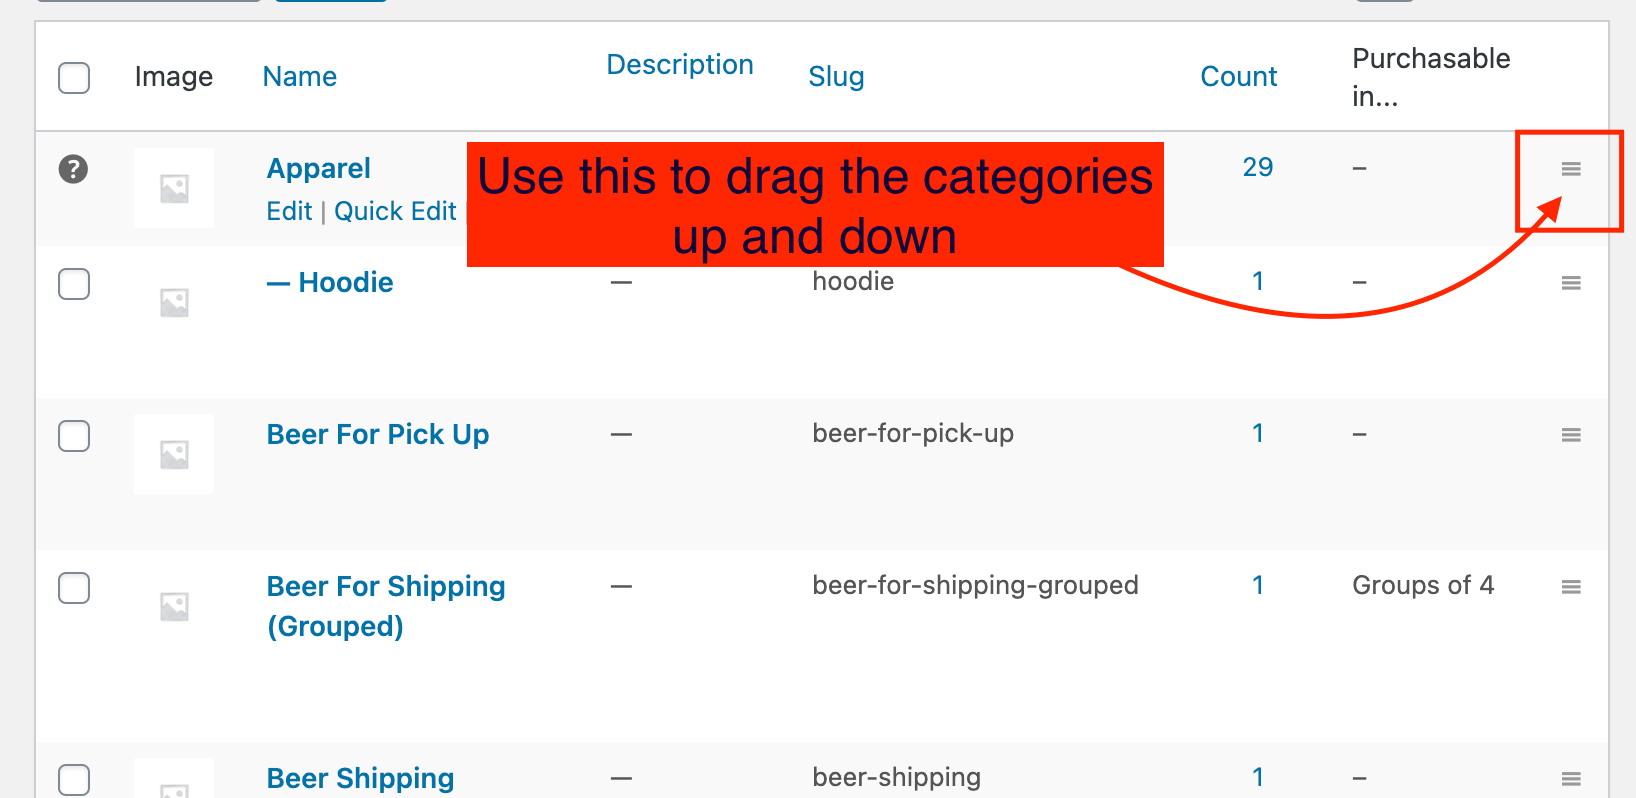
If you want to change the order of shop tiles on the homepage, you'll go to Products > Categories > and drag the categories up and down (the top is what will display first on the shop's homepage):
Tips
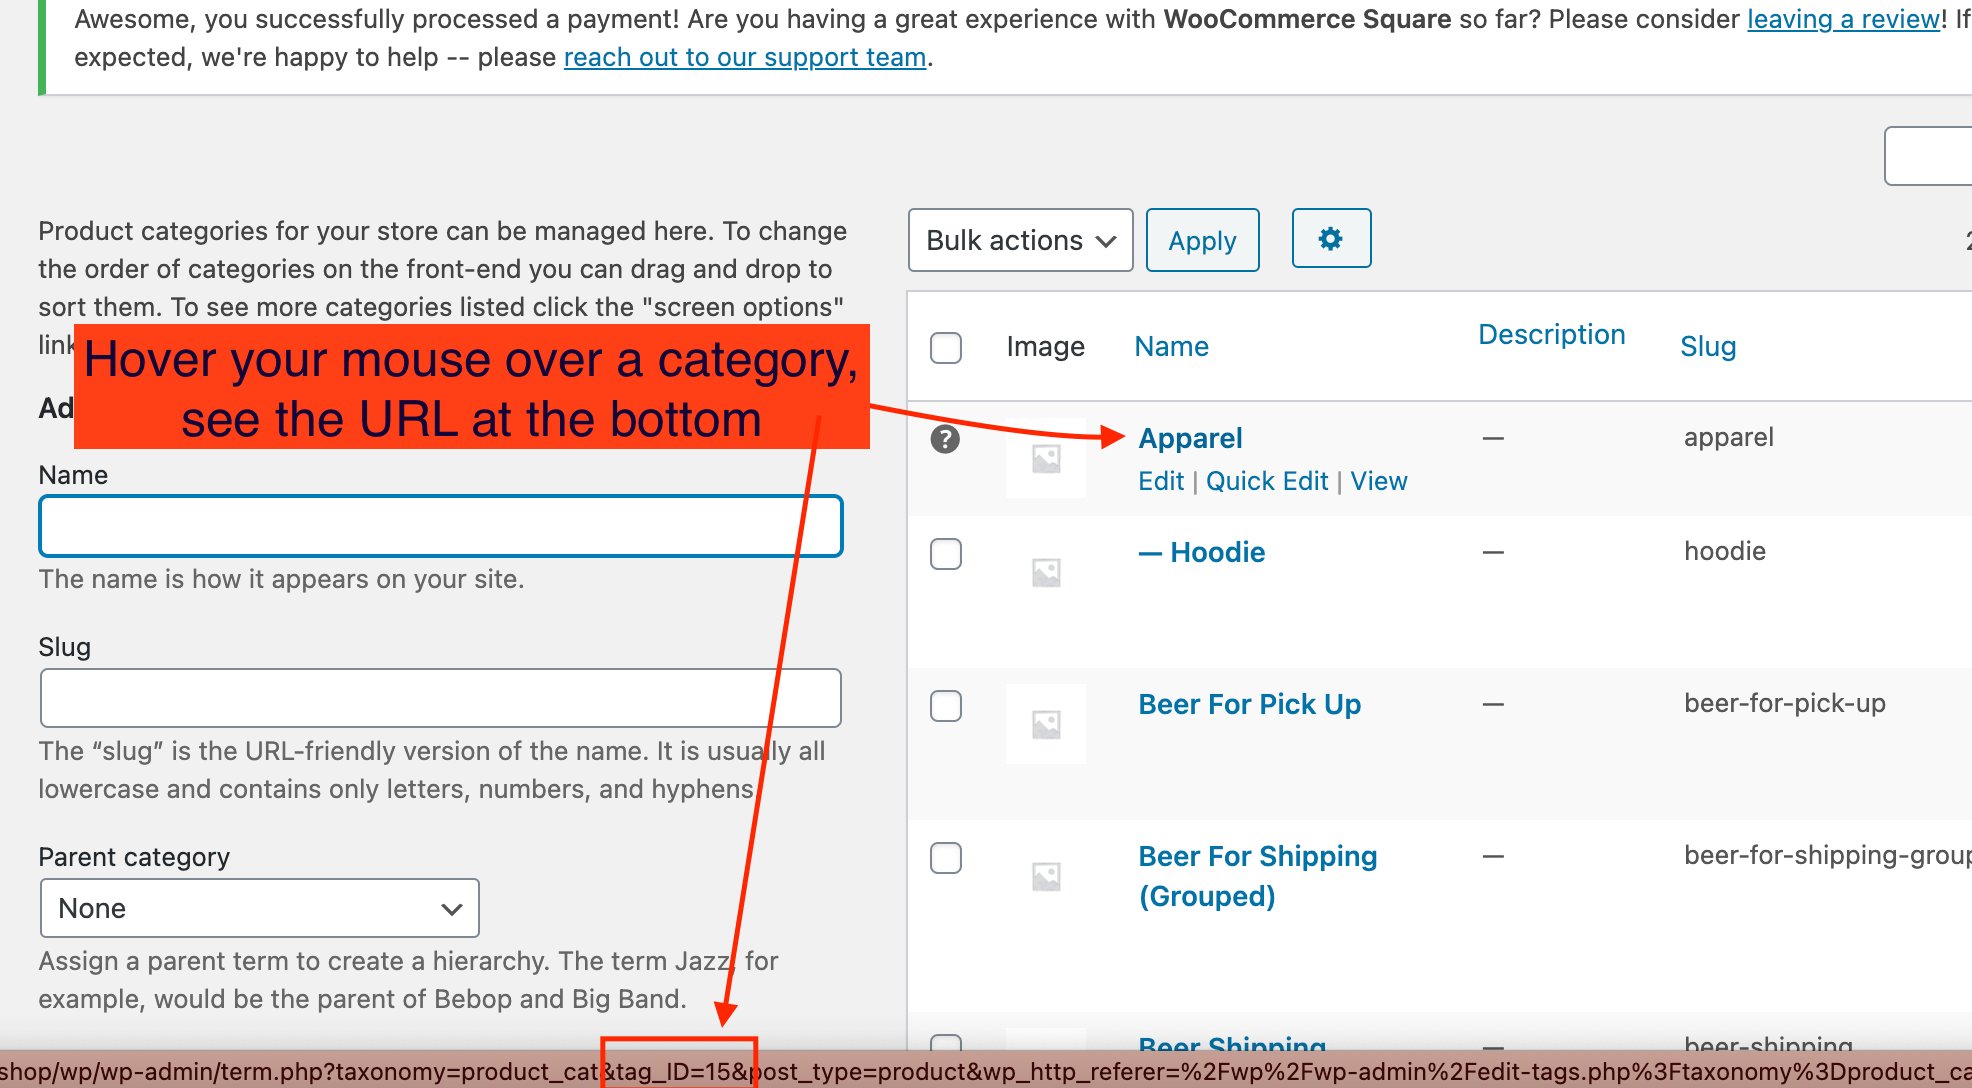
Products > Categories > Instead of going into each category to find the ID, you can hover your mouse over the Category title and see the same URL at the bottom of your screen. Look for " &tag_ID=___" in the URL. For example: